Archive

Monthly Archives: August 2016

Amber-Interiors-Before-and-After-Client-Double-Thumbs-up-Neustadt-54

remember that 2002 nelly song dilemma (feat. kelly rowland)? no? let me remind you.

“no matter what i do, all i think about is you…even when i’m with my boo, you know i’m crazy over you.” 

it was–and still is, if you ask me–a JAM. a slow jam, but a jam nonetheless. anyway, a nelly style dilemma is what i am having right now in regards to my bedroom sconces. every time i think i’ve found “my boo” i go crazy over another sconce! CHAMPAGNE PROBLEMS, people. but seriously, i am spoiled for choice (there are 9 TRILLION sconces in the world), and i can’t for the life of me find the sconce for me and my bed.

bedroom sconce

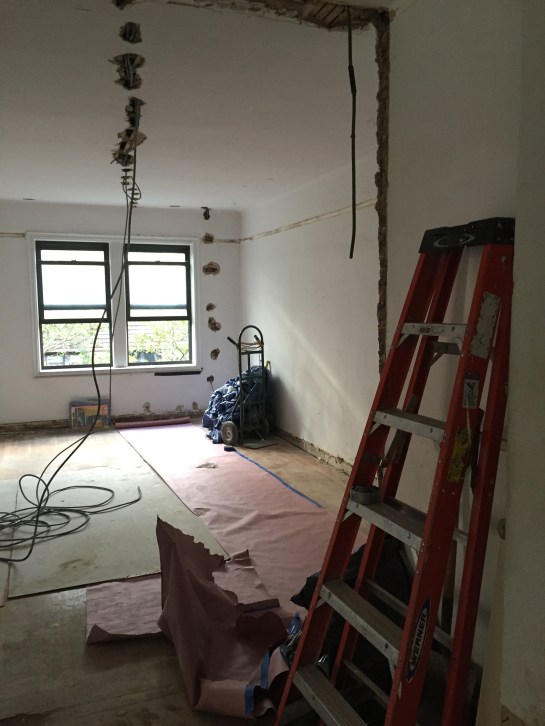
why, you might be asking, does this matter now? i’m still in the construction phase. why am i worrying about lighting? well, as it turns out, there are two kinds of sconces: plug in and hardwired. hardwired means they are actually wired into the wall, early on in the process–which means that if i’m going this route, i have to choose their exact placement NOW (if i go for plug in, i have a little more time to decide). i haven’t 100% figured out my design plan for the bedroom yet (i want to wait until the closet is built out to see where things will fit/what will fit), and i’d also like to upgrade to a queen bed (but need to wait on my budget to decide). both of these things make choosing exact sconce locations now a wee bit complicated.

13e1be366fdb330251e2093d45286fb1-1

so why would anyone in their right mind choose hardwired sconces? for starters, hardwired sconces tend to be cleaner (see above), a little more sophisticated (like these from pottery barn), and for the most part, tend to look a little more intentional. which, you know, they are, because you chose them ahead of time and MADE A PLAN as to where to put them (anyone who knows me knows I LOVE PLANS).

f7f09eaf22ee135dd176d3eaca4cbcbd

that being said, plug ins have come a long way (i have been eyeing these pretty babies from schoolhouse electric, as seen above). it’s not all “you mama says you ugly” cords up in here. and, as a major benefit, plug ins offer way more flexibility. so long as you have an outlet relatively close, you can put them up whenever, wherever.

though my electrician assures me that i am “the boss” he’s also said multiple times that hardwired would be better, and if i can figure things out now, i should. but i just can’t decide! i want the flexibility to upgrade my bed and futz with the layout in the design phase, but i also have found many a hardwired sconce that i quite like.

so, where does that leave me? here are my top contenders are of now. they are TOTALLY different. the top is a sophisticated hardwired choice, the bottom is a younger, pop-ier plug-in option that comes in both white and brass. thoughts?!


IMG_8254

welcome to the disaster zone!

yesterday, while “editing” this video (and by that i mean lightening it ever so slightly), it occurred to me that if i really want to do this right, i should hire someone to film a few video shorts of the process. NOT try to do it myself. because as the video below evidences, i am a SHITTY videographer. and my iphone is NOT up to the task. keep your eyes peeled for upcoming videos–which hopefully will be prettier than what’s below–but in the meantime, in the absence of anything better, i thought i’d show you where we stand.

for those who prefer photos over crappy iphone footage, here are a few more in-progress shots. these were taken last friday; this week, they’ll start prepping the electrical work, then sheetrock over the walls to make things flat and pretty, and maybe even lay down the kitchen tile (!!!!). stay tuned, friends, because it’s ABOUT TO GET GOOD.

new york city apartment renovation

standing in the entryway | looking into the living room

NYC apartment renovation

kitchen to the right | that sewage pipe will be turned into a seemingly purposeful pillar, and the breakfast bar will go directly to the right of it

nyc kitchen renovation

kitchen scariness | back wall will house the fridge, upper and lower cabinets, and a pantry

NYC apartment renovation

living room into hallway | bedroom to the right, bathroom to the left

nyc apartment bathroom renovation

staring into the bathroom | floor will be penny tile, walls will be white subway

IMG_8150

HOLY GARBAGE PILE | living room looking into entryway/kitchen

once the first day of demo was done, things started moving quickly. work kicked off last thursday, and on friday, i stopped by the grand apartment before work to take a look at the progress. i’d gotten so excited at the photos i’d received from my contractor on thursday that he told me i should come by the next morning–so i could “feel like i was part of the process.” it’s like he read my HGTV-saturated mind!

i won’t bore you with the basics, but here’s what you’re going to see below: the living room/entryway, all demo-ed out, with a short description of what’s planned/where they’ll head next. suffice it to say i am THRILLED that things have finally started picking up, and i cannot WAIT for the next step (designing my kitchen, EEK!).

also, if anyone wants to volunteer to stop by and take a slo mo video of me knocking something down, please let me know. i was too embarrassed to ask shmulik to do it.

so, let’s get down to BUSINESS, and look at some pictures of “my dust and debris” (as my boss so lovingly referred to it).

IMG_8140

this is the living room, in its current state. those drawers you see there were part of the old “built ins” in the kitchen. i would have saved them if they were in better shape, but they were literally sloping away from the ceiling/wall, and had about 12 layers of paint on them. alas, my new cabinets will be shiny and pretty and light and bright. sorry, old drawers. also, see that dark line up towards the ceiling? that’s where the picture rails used to be. i had shmulik take them all down, in hopes of installing crown molding throughout once things have been patched up and repainted. he also stripped the floor molding so that we can start fresh down there (and seal it off so that no roaches get in…YUCK).

IMG_8144

so much garbage. the door frames were metal (you can see them sticking out in the middle right of the photo)

IMG_8143

i decided to have shmulik open up the faux arched entrway between the living room and entryway to allow more light to seep into the space. as soon as i saw these photos, i yelped with glee. already, it feels SO much more open. having a nice wide open entryway is really going to make all the difference – especially once the breakfast bar goes in.

IMG_8141

another shot of the entryway, straight on 

so, let’s talk about this angle. what you’re seeing above is living room to the left, entryway to the right. originally, when i discussed the plans with shmulik, i wanted to replace the closet i tore down on the right (to create space for the breakfast bar) with one in the space above (where that junction box thingamjig is hanging). i thought this was the perfect plan: i’d get my breakfast bar (!!) and i’d still get storage (even more of it!).

IMG_8139

where i thought i could build a closet

these dreams were dashed on friday morning, when shmulik and his guy, george, informed me that if i added a closet in the space above, it would have to extend at least 24″ out. add onto that doors and such, and you’re looking at a depth of 28″, minimum. add onto that the depth of the breakfast bar that will be directly across from it, and i am, as shmulik put it, “making space only to close it off again.” effectively, i COULD have a closet in the space above–but it would mean a tight entryway that would diminish the light i’ve created by knocking down the wall, and make for a bit of a squeeze when people actually sit at the breakfast bar.

IMG_8147

i could put a closet here, but then it would be in the living room. and that’s just weird.

BUMMER. like, MAJOR bummer. shmulik offered to build the closet on the short wall to the left of the entryway (aka, IN the living room), but i said no to that. i want to put a dining area there, and a little closet in the back right corner of the living room would be super wonky. design fail.

if only i were carrie bradshaw and i used my oven as storage! alas, no can do. my new plan is to get a REALLY sweet coat rack (if you see one, let me know), and a nice console table with baskets underneath for extra storage.

i am not 100% satisfied with this plan, but i think it’s my best option. also, it wouldn’t kill me to go a little marie kondo before i move.

any thoughts? suggestions? HELP ME FIND STORAGE. HELP ME FIND PEACE. HELP ME FIND THE SERENITY TO THROW OUT (DONATE) HALF OF MY STUFF. PLEASE.

IMG_8128

baseball cap on one, yarmulke on the other. welcome to the lower east side.

guys, i know it’s been a wee bit quiet around these parts, but that’s because for a few weeks, i was waiting on things like permits and board approval and i didn’t want to bore you with the basics. but that’s okay, because i’m back, and WITH A VENGEANCE! that’s right folks, i have FINALLY started construction, and the first phase of that is none other than DEMOLITION, which i have literally been waiting for since i put my offer in on the grand apartment back in january (i know, i know. this shit took so freaking long).

see, as i’ve told you before (and as anyone who knows me even a little bit knows), i am an HGTV addict. like, check me into property brothers rehab, i have a problem, i can’t stop watching drew and jonathan tear down walls and build them back up again. if you, like me, watch property brothers (or really, any other show on HGTV), you know that “demo day” is a BFD (for my older readers, BDF = big fucking deal). demo day is where it all begins. it’s also where HGTV likes to insert scary/sad music jonathan knocks down a wall in the kitchen only to discover that it’s load bearing and the homeowners can’t do the open concept he’s promised. essentially, demo day is where stuff starts, and more importantly, where stuff starts to go wrong. why? well, you can’t know what’s behind a wall until you tear it down. and that’s what demo day is all about.

my first reality check came in the form of a sewage pipe, cleverly disguised behind the wall separating the entry to the kitchen and the closet directly to the right of it.

IMG_8132

giant sewage pipe that literally runs the length of the entire building. of course i bought the unit where the sewage pipe lives. 

last wednesday, i met my contractor, shmulik, at the grand apartment to discuss plans (mostly, to remind him of which walls we were knocking down. thursday morning, he met me outside my current apartment to pick up the keys (which i had stupidly forgotten the morning before). and by thursday afternoon at 3pm, my phone was dinging with the pictures above. demo had officially begun! and with it, bad news had arrived: behind the wall that i intended to (mostly) tear down didn’t just contain the electrical junction box. it was also hiding a gi-NORMOUS sewage pipe that housed ALL THE POO IN THE BUILDING.

if these walls could talk, they’d have some serious potty mouths.

that was the worst joke i’ve ever made. ANYWAY, let’s get into the nitty gritty, shall we?

where the workers are standing used to be a) a set of “built ins” in the kitchen and b) a coat closet. i had shmulik demolish both to create room for an L shaped breakfast bar that will wrap from the kitchen into the space you see above (out into the living room). the goal was to bring more light into the space, open things up (while i can’t do total open concept, i wanted to create a sight line from the kitchen into the living/dining area), and add extra counter space/storage below.

IMG_8127

another angle of the pipe. it’s enormous. 

that plan was all well and good until they started knocking things down and discovered that the “wall” between the kitchen entry and the closet was there for a reason. a very large, brown metal reason that starts with “sew” and ends with “age pipe.” GROSS. i asked shmulik if it could explode and rain poop all over my pretty new home and to his credit, he didn’t laugh, but instead, assured me that no sewage would be exiting the pipe and entering my new space. HALLELUJAH.

so, what does it mean? thankfully, my breakfast bar can still happen. but the “tiny little pillar” i intended to construct to house the electrical panel (you can’t really see it above, but it’s there) will need to be about a foot wide to house the sewage pipe too. it’s not ideal, but it’s also not the worst thing ever. so my tiny little pillar becomes a rather large column. so long as it hides the poop chamber, i’m satisfied. and if we can make it look cute (maybe some crown molding up top? some art on the wall?), all the better. renovation = compromise, and so long as i still have a place for two people to sit their booties down and swing their legs while they happily sip wine and chow down on pasta, i’m happy.