Archive

renovation diaries

IMG_8254

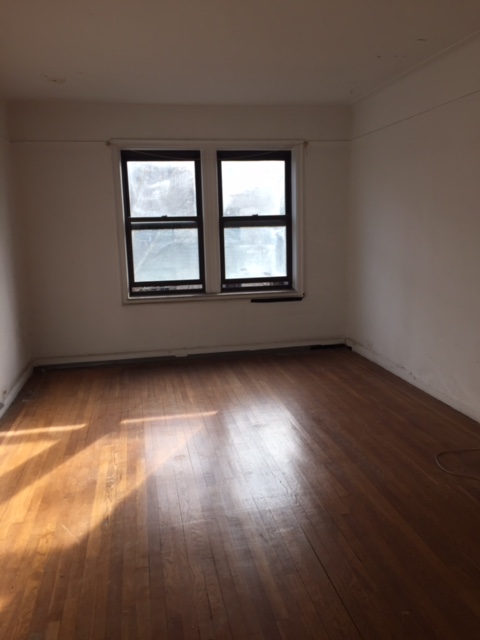
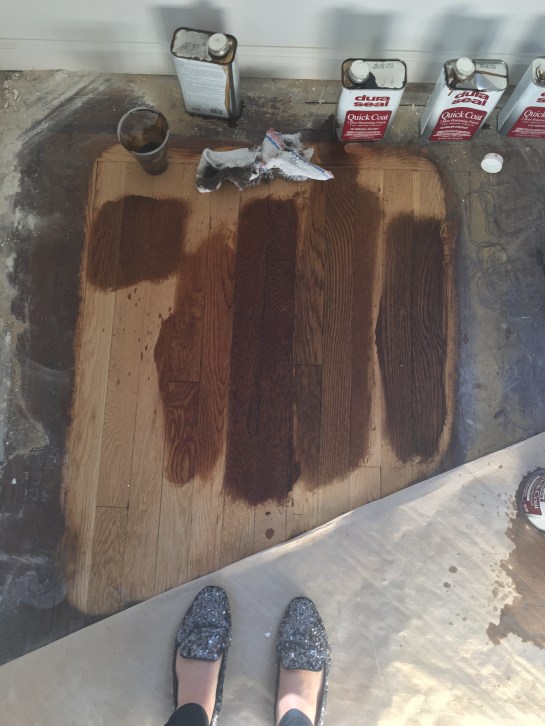
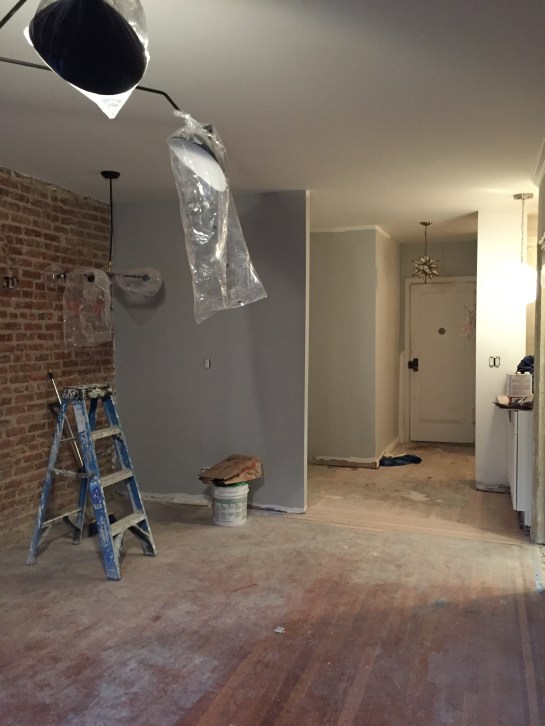
me, early on in my renovation at the grand apartment

you guys ready for a real #tbt? here’s a little video i took, on my iphone, way back in the summer of 2016, when i closed on my little apartment on grand street. it’s the before tour of all before tours (at least, around these parts). i was just diving into the blogging world, i’d just started my instagram, and i was feeling a wee bit overwhelmed by the immensity of the project i’d taken on with exactly zero renovation experience.

cut to three years later, and i’m itching to do it again. luckily, my sister has asked me to help her redecorate (no, not renovate, at least, not anytime soon!) her apartment, giving me a new project to focus on, and a whole new set of “before” photos to share with you!

if you follow me on instagram, you may have seen these the other day – but i’m re-sharing them here so that i can talk you through them in a bit more detail. in the upcoming weeks, i’ll be sharing full design plans, but design plans are nothing without a little background, am i right?

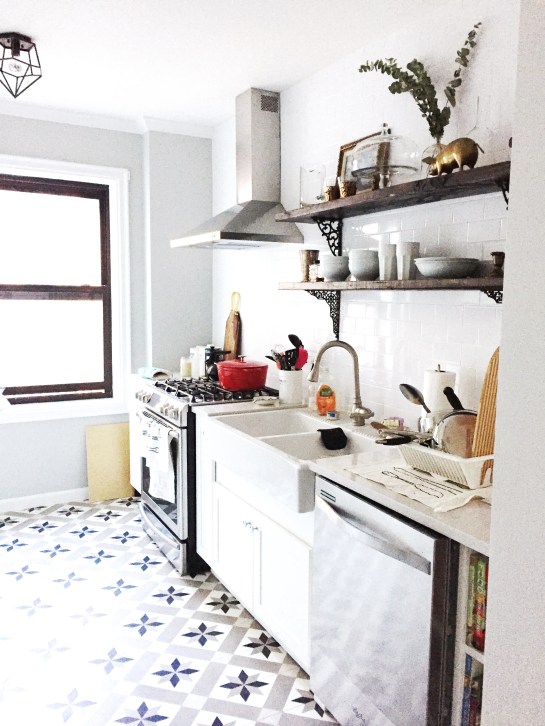
let’s dive in, shall we? below, we’re standing in the kitchen, looking into the bedroom. this unit is on the top floor of an old house (built in the 1900s, i believe) that was turned into a two family home many years ago. because of this, the house has both good bones (the wainscoting in the bedroom!) and some very weird design decisions (the ceiling tile! the weird kitchen layout!). i’ll get into more detail on our budget later, but it’s a redesign/decorating budget, not a renovation one. if we have some money left over, we may do some small upgrades in the kitchen (flooring – bye linoleum!, lighting), but for now, most of it is staying as is.

IMG_7457

so, the bedroom! it’s my favorite room, to be honest. that wainscoting really gets me. when allie first moved in, she was really into blues and greens, so we painted this room a pretty seafoam green. over time, her tastes have changed, and so we’ll be taking the bedroom in a more neutral direction. it’s amazing what a fresh coat of paint can do, and we’ll be moving in the white/off white direction.

you may have noticed that there’s not really any furniture in the bedroom as of now. that’s because allie couldn’t seem to make it work, layout-wise, and instead of calling her older and wiser sister 😉 she decided to call it quits and move EVERYTHING into the living room. more on that in a minute, but suffice it to say, this room needs help. luckily for us, the fact that it’s empty means we can a) paint it ahead of time and b) store all our furniture deliveries in here ahead of install day.

IMG_7459
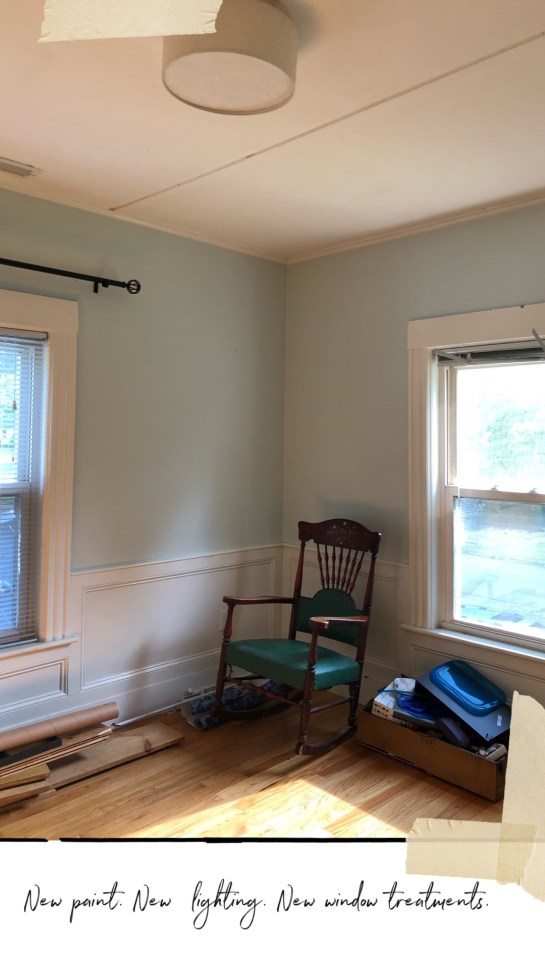
we’ll need to patch the window frames before we add a fresh coat of paint throughout (we’ve already got the colors picked out, and allie is planning on throwing some samples up on the walls to make sure we’re headed in the right direction). we’ll also be getting rid of these curtain rods, and hanging the new ones much higher up (something 2013 sarah did not know!). new lighting will a) modernize the space and b) make more of a statement and c) light the room better (more bulbs = more light!).

IMG_7461this room has a cute set of double closets (if we were doing real construction, i’d knock down this wall to make the room larger and let the light in, but such is life!), but they need a bit of work.

IMG_7458

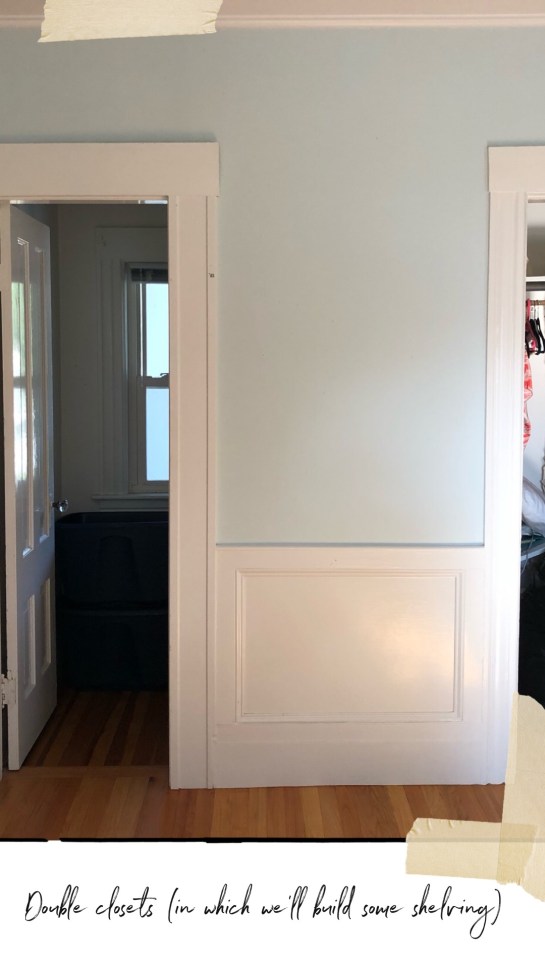
we’ll start with a fresh coat of paint, and then we’re planning on building out some simple shelving in here, so that allie can actually fold and stack her clothes (right now, they’re crammed into too-small vintage dressers). if i can find someone local and cheap enough (like a friend’s handy husband!), i may actually sketch out something beyond just 3 shelves, but that’s our starting point, at least for now. the bar will come down, as the second closet has plenty of hanging space.

IMG_7462
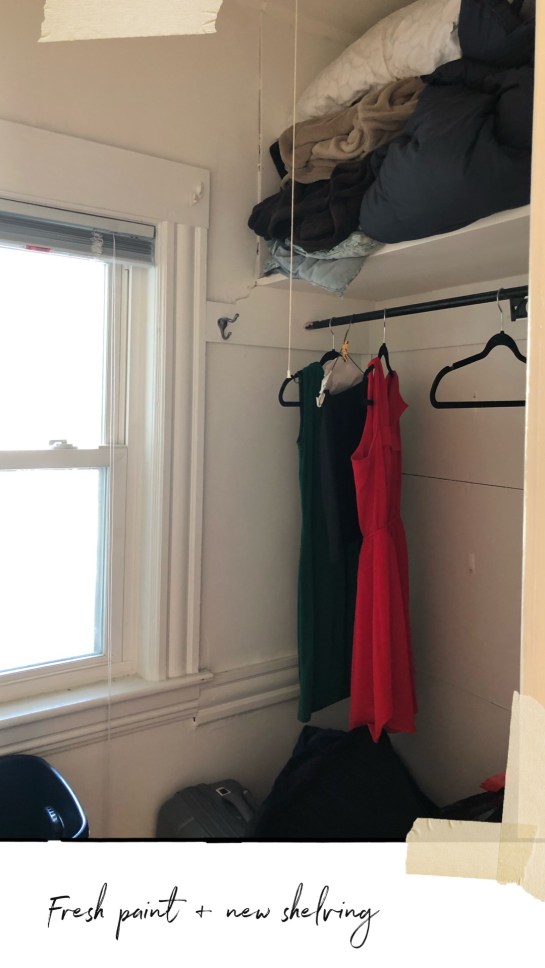
here’s the second closet. in here, we’ll remove the front bar (allie dresses super casually, and doesn’t have a ton of stuff to hang), and find better shoe storage. i’m thinking a back of the door shoe organizer might work best, so that we can free up the space inside the closet itself. she’s in the process of sorting through the bags below – all of which are clothes she potentially no longer needs/wants – to figure out what can be donated. if anyone has any amazingly bright ideas for what to do in here, please let me know! i’m going to be looking around for good DIY closet ideas over the next few weeks.

IMG_7460i’ve also (happily) talked her into getting rid of these blinds. if she wants blinds, we’ll do bamboo ones (like i have in my kitchen), but the plan is for simple sheer white curtains in here, to let the sun shine in. it’s the little things, folks!

ok, moving on. right now, as you’ll see below, allie is using her living room as her bedroom, her dining room as her living room…things are a wee bit weird! for as long as i can remember, she’s liked crowding as much stuff as possible into her spaces, and this space is no exception. our task here is to help allie figure out what she needs in her space, functionally, and then what will make her happy, figuratively.

we painted this space a pretty grey tone when she first moved in, and we’re still pretty happy with it. for both time and budget reasons, i think we’ll leave the paint as is (though i’d love to be able to give everything a fresh coat of bright white, i’m not sure it’s in the cards right now. TBD on that front!).

this space will get, at minimum, new lighting, new window treatments, all new furniture, a new layout, new rug, and new art. so, basically everything but the paint color will change. and if i magically zoom through painting the bedroom in early august, i might just tackle this area too 🙂 i will say this paint color tends to photograph rather dark (i didn’t edit any of these photos, in hopes that they’d be true to life!); in person, it reads a much lighter.

IMG_7464

we’ll start by clearing everything out, and putting the bedroom back where it belongs. one thing that became immediately clear to me during my most recent walkthrough was how much allie needs better storage. this apartment has only 3 closets (but a lot of usable attic space, and a basement!). there are the two in the bedroom, and then there’s one in the dining room. the door you see above leads out into the hallway – but allie never uses that as an entry to the apartment (there’s another door from that same hallway into the kitchen, and she generally enters that way, or through the outside second floor porch (which also leads into the kitchen). that said, if i can make it work within the layout, my goal is to not block this door, just in case she ever changes her mind!

to the right of where she’s got her bed is her desk area. allie works in IT, and is a big computer person (lucky for us, she’s like having the geek squad on demand!). right now, she has two ikea desks creating an L shape for her workspace, but my goal is to figure out how to simplify it down to one. then, we’ll add drawer storage (via filing cabinets from CB2 ), and create a corkboard wall (like this!) for her to pin up art, inspiration, important notes, calendars, etc.

IMG_7452

see that cool looking vintage camera and globe above? those belonged to my grandma and grandpa. i told allie to hang onto them – they’ll make great styling tools when the time comes! above you can also see a mini bookshelf. allie has two of these in her apartment, and while there’s nothing WRONG with them, i want something a little sleeker, and more importantly, taller. when in doubt, follow the manhattan model: build up. we’ll actually be utilizing one of the dining room walls (where the yellow dresser is below) for a big bookshelf.

IMG_7463

the living room and dining room are, ostensibly, one larger, interconnected space, and i’m designing them as such (which you’ll see when i share design boards for this space). oddly, the owners covered up the beautiful wide plank hardwoods with yucky parquet at some point (but only in the dining room!). we don’t have the budget to rip these out and refinish what’s below, so for now, we’ll put a big rug in this space to try and distract from the ugly flooring.

IMG_7454

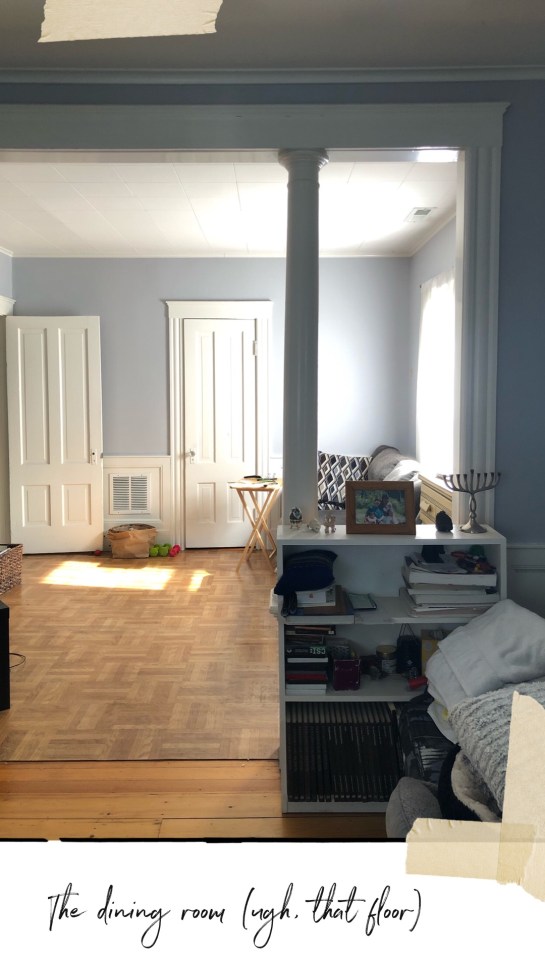
here’s another view of the dining room, which allie’s currently using as her living room (her couch and GINORMOUS TV are in here). a few of you commented on those ceilings in stories, and while i too wish they could go, that’s more of a renovation situation than a redecorating one. my hope is to make the rest of the space sing, and just let the ceiling tiles blend into the background. work with what you’ve got, and all that.

one thing i do love about this space is those columns. are they a little intense? sure. allie hates them and wants them gone. but i think with a fresh coat of (less shiny!) paint, fresh design, and better art on the walls, we can make this room beautiful. the door you see straight ahead in the photo above is one of the aforementioned closets, and it’s where allie stores things like air purifiers, fans, vacuums, etc. to the left is the door to the kitchen. right now, there’s absolutely zero shelving in there, too. i’d love to get some hooks to mount some of the items above (and things like brooms), and free up the floor space for some baskets or bins (to store things like games, office supplies, etc.).

IMG_7456

this photo is snapped from the kitchen. the closest door is to the left. this space exemplifies what i talked about in yesterday’s post: a mishmash of what was cheap, or what was comfortable, or what was available – but no real design. i’m THRILLED to say we found budget for a new couch, so this one will be getting donated. and goodbye, TV tables, i shall not miss you. we’ll patch the holes above, raise the (new!) curtain rods, and get brand new curtains (window changes will happen throughout the entire space). this room doesn’t have an overhead light, and since we don’t want to tear down the ceiling, my plan is to get a hanging plug-in pendant, and run it up the wall and over the ceiling, then dangle it down, centered over the dining table.

ok, folks – that’s the gist of it! questions? thoughts? brilliant ideas? i’m all ears.

IMG_2538“so, is your apartment, like, done?”

this is a question i’ve been hearing a lot of lately. it’s the question people ask me when they haven’t seen me in a while, or when i’m a friend of a friend, or when they’re generally not sure WTF else to ask me about (hey, at least it’s not my love life).

it’s also a question i’m not exactly sure how to answer, because while my home is “done” in the sense that there are no more breakfast bars to build, no more brick walls to seal, no more huge projects to take on, design is never really done. and there are about 10 things that, in an ideal world, i’d redo or do differently.

this is not, of course, what i say to friends of friends. i say, nicely, “it’s done, yes. mostly!”

and then the conversation sort of trails off, because lord knows the average bro doesn’t exactly care to chat about the ceiling medallions i never got around to installing, or how i don’t think my kitchen lights are quiiite bright enough.

then again, lord knows the average bro probably doesn’t want to talk about much of anything. and that’s why i write this blog not for them, but for YOU, my dear readers–the tiny little group of internet friends who could talk about tile for days on end.

so, let’s talk, shall we? i thought it might be fun to run through my “to do” list, and discuss what’s next.

5 things i’d still like to do in the grand apartment: 

  1. figure out my kitchen lighting situation. the lights i bought are pretty, but not perfect. and i want perfect, goddammit! i have a feeling that my solution lies in purchasing new pendants and getting around to installing the under cabinet lights i bought from ikea, oh, six months ago (#slacking). it was a big mistake not to go for under cabinet lighting originally, but sadly, i can’t go back in time, so ikea it is. IMG_2483
  2. get a cushion made for the entryway bench. though i own a sewing machine, my skills are below average, and i am most certainly not good enough to make the piped cushion of my dreams. when i designed the storage unit, i had visions of this super chic bench that was cozy and cushy and outfitted in an indigo or suzani or some other uber cool fabric. and while i have multiple indigo cloths sitting on a shelf just waiting to be made into pretty things, i have yet to make a move. as a side note, i have checked on taskrabbit for seamstresses, and haven’t found any. if you know one, please send them my way! Grand Apartment Entryway
  3. install my ceiling medallions. back when i was in hardcore renovation mode, i got really into the idea of pairing antique-looking ceiling medallions with my modern light fixtures. i even went so far as to order them, and order the glue/caulk to go with them. and then i shoved them in the bottom drawer of my dresser, and they’ve sat there ever since. of all the projects on this list, this is most likely the easiest one to DIY (i ordered precut medallions, so i literally just need to stand up there and glue them on), but for some reason, i just can’t seem to motivate myself to do it.
  4. figure out the bathroom walls. you may recall that for a hot second, i thought about painting my bathroom black. this nearly gave my mother a heart attack, so i took a step back. here the thing: in all the pretty design photos i see online, white on white on white looks bright and beautiful, but in real life, white grout quickly looks yellow, and white tile on white paint just looks a little…dingy. i am VERY clean, so it’s not so much about actual dirt as it is the way that the two whites (tile + paint) play against one another. i thought about doing wallpaper (i LOVE my wallpapered entry), but worry about the lack of a ventilation in the bathroom ruining it. i’ve considered going full on hoarder gallery wall (and have collected some art for this purpose), but haven’t taken the plunge. and then of course, there’s the option of painting: black? grey? some other obscure color (i am obsessed with the wall color at catbird in williamsburg but haven’t been able to identify it…)?
  5. solve the bedroom lighting sitch. when i decided to build out a rather large closet in my bedroom, i knew it would mean cutting down on the amount of space i’d have for bed, nightstands, etc. but i didn’t think about how it would affect the lighting in the room. as of now, i have a table lamp on my dresser, and sconces on either side of the bed (i chose a ceiling fan over an overhead light, which i don’t regret). ideally, i’d also have some sort of floor lamp to cast extra light into the room, but i haven’t found the piece or the place for it. i’ve toyed with the idea of getting rid of my nightstand and getting a larger console-like piece for that side of the bed (i could stick another table lamp on the other end of it…), or getting matching nightstands with table lamps instead of sconces, but i have yet to nail anything down. IMG_2664

so, there you have it: 5 things i still need to do (admittedly without a ton of resolution around HOW/WHEN to do them). tell me: would you be interested in seeing more drawn out posts around these “design dilemmas” and my thought process on solving them? or are you more in the camp of, THIS SHIZ IS BORING, NEXXXXXT?


IMG_2063

yes, friends, you read that right. the title of this post is exposed brick and THE BUGS THAT COME CRAWLING OUT OF IT

because one did, about a month ago. one GI-FREAKING-NORMOUS centipede came crawling out of my exposed brick wall at 10pm, and proceeded to turn me into a full on crazy woman (think oprah when she’s knee deep in “YOU GET A CAR!” mode). but before we get into that story, let’s take a bit of a stroll down memory lane, shall we?

when i first purchased the grand apartment, the living room looked like this.

grandapt_before_LR

and the back wall, in particular, looked like this.

grandapt_before_LR3

looking at those “before” shots is kind of a trip, if i’m being honest. it looks so much smaller, doesn’t it? it’s amazing how much larger a room looks once there’s actual furniture in it (yes, i’m throwing shade at the dorm style fixture above).

c3ffce8c0d70b117be6c2306d28404d0

exposed brick (see exhibit A, above) was high on my initial “must have” list, but most NYC apartments blessed with it (especially those in the east village/lower east side) are MUY TINY and MUY DARK. like, you would not believe how tiny and dark some of the units i looked at were. what are we, mole people?

so when we first toured the grand apartment, and there was no exposed brick in sight, i took it for what it was: a relatively large (by NYC standards) lower manhattan 1 bedroom that i could afford, and more importantly, that i could make my own.

it wasn’t until my electrician started chipping away at the walls to bring the outlets up to code that we noticed anything amiss. and by we, i mean me, because no one–not the electrician, not the construction workers, not my contractor–noticed it but me.

one muggy august morning (god bless you, new york summer), i rode down to the grand apartment to check on the electrical progress before work, and there it was, peeking out from behind the plaster: a little hint of reddish brown.

i knelt down amongst the debris, and peered into the small spot no longer covered by plaster.

“hey shmulik,” i called to my contractor, “can you come look at this?”

he, too, knelt down amongst the debris.

“is that brick? that looks like brick.”

he shrugged.

“looks like it. a lot of these old buildings have brick behind the plaster.”

pitter patter went my heart.

“is there–could there be–do you think there’s brick behind this entire wall?”

“could be,” he answered nonchalantly.

NONCHALANTLY. AS THOUGH A GIANT WALL OF ORIGINAL 1920s BRICK WAS NO BIG DEAL.

i stood up, and dusted myself off.

“how much extra to open up the entire wall?”

he stared at me. behind him, a worker chipped away at the plaster, piece by piece, with a small hammer-like object.

img_8852

finally, he spoke. “it’s a lot of work.”

“how much work?”

“a few days extra, at least.”

a few days, i could live with. for original 1920s brick, i could live with just about anything. i told him to move forward, and we’d deal with making up the time later.

and the rest, as they say, was history.

img_8837

img_8688

a little over a week later, the wall looked like this.

img_9066


after move in, it looked like this.

IMG_1899

magical, isn’t it? that wall is, by far, the best thing that happened to me during this renovation. for all the bullshit and the things that went wrong, my exposed brick wall is my miracle baby.

at least, it was, until i realized that exposed brick that’s, well, not meant to be exposed causes a few problems:

  1. so much dust
  2. BUGS. REALLY F’ING BIG ONES.

now that we’ve looped back to the present day, i’ll remind you of what came crawling out that beautiful brick one night.

House Centipede, Scutigera coleoptrata

is that not the most TERRIFYING BUG YOU HAVE EVER SEEN?! literally, i have chills just looking at it. WHY SO MANY LEGS?! WHY WOULD ANYONE EVER NEED THAT MANY LEGS? like, what else are you doing with your legs at any given time beyond walking on them? TWO WOULD SUFFICE. FOUR WOULD BE FINE. THIS MANY IS JUST ATROCIOUS. 

the above, my friends, is a sight you can’t unsee. which is why, after dealing with the dust for months and telling myself i’d “get around” to sealing the brick wall eventually, a single centipede propelled me into action. and by propelled me into action i mean lit my ass on fire.

after almost 10 years in new york, i consider myself to be pretty good at this whole “alone” thing. i’ve learned to not just accept, but to embrace independence. that said, there is nothing – NOTHING, I TELL YOU! – that makes you feel the full force of your singledom like a giant centipede. especially one with that runs so fast you can’t possibly catch it.

suffice it to say that even after penny managed to get the centipede down off the wall and theoretically ended things, i stripped my bed clean of all blankets and pillows before climbing into it, and checked the inside of my toilet bowl before i sat down to pee (can you even IMAGINE one of those crawling into your butt?! i can’t). that night, i barely slept, and by morning, i had made it my mission to SEAL THAT BRICK. ASAP.

but that, friends, is a story for a different day. because as it turns out, like every other renovation task, sealing a brick wall is no small feat. that said, it’s a feat that i accomplished (with a little help from my fam), and i intend to show you how you can accomplish it too.


IMG_1899HEY. HI. HELLO THERE! HOW ARE YOU? i know, no one wants to hear the story of the amateur blogger who got too busy with her day job and dropped off the face of the earth. but it’s true truth, really.  i know it’s been a while since you heard from me, but life got away from me, and i spent a few months living life out in the world instead of on the internet.

SO SUE ME.

that being said, a few VERY KIND strangers have commented that they’d like to hear more about the grand apartment, and when kind strangers ask for something, you must give it to them. so here i am, attempting to fill you in on the last few months, and promising, yet again, that i’m back for real. (yes, i’m aware that you haven’t heard a peep from me since december).

here’s some real talk: around the same time i moved into the grand apartment, i got promoted at work. i worked my ass off to get there, and i pushed hard for the promotion, and then i got it, and for a little while it was like, this is it? same shit, different title? then the new year rolled around. and we hired someone to work below me. and then we hired someone else. and guess what, you guys? MANAGING PEOPLE IS HARD! i know, i know, DUH, SARAH. but let’s just say i wasn’t exactly prepared for doing my workload and supervising someone else’s at the same time. so i spent the first few months of this year buried in the weeds, trying to keep my head above water (a new feeling for me, if i’m being totally honest. it takes a lot to bury me).

at the same time, i experienced a bit of renovation burnout. the apartment wasn’t (and isn’t), 100% done, but i was OVER IT. over with bugging contractors, over with dealing with the asshole who screwed up my countertops, over with handing off huge sums of money to people who rarely did things exactly right and/or in the timeline required of them.

IMG_1924
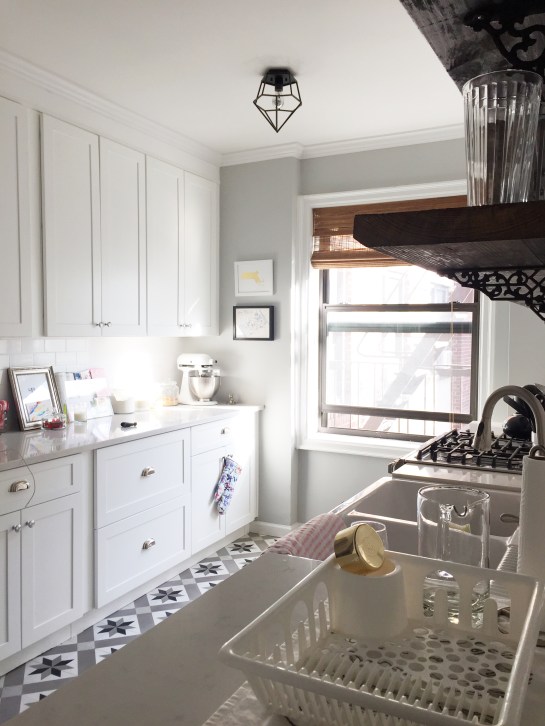
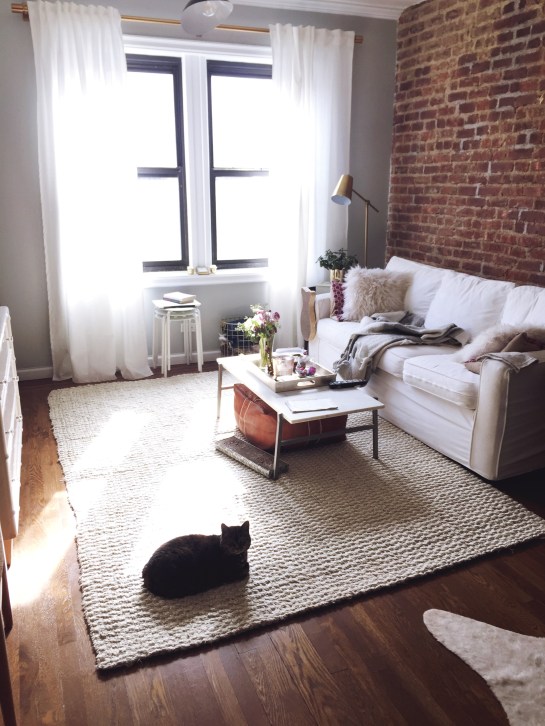
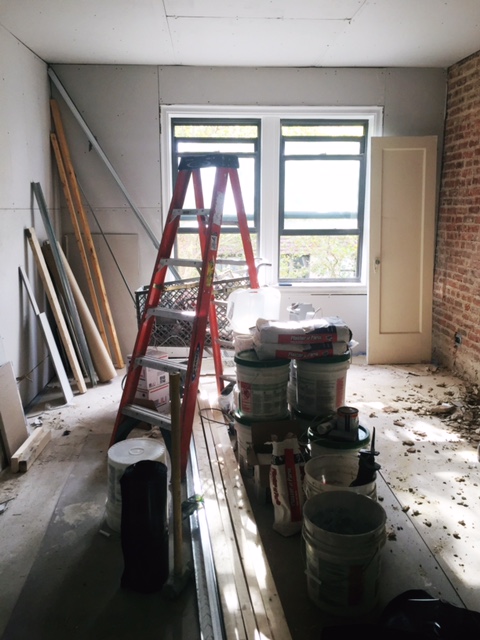
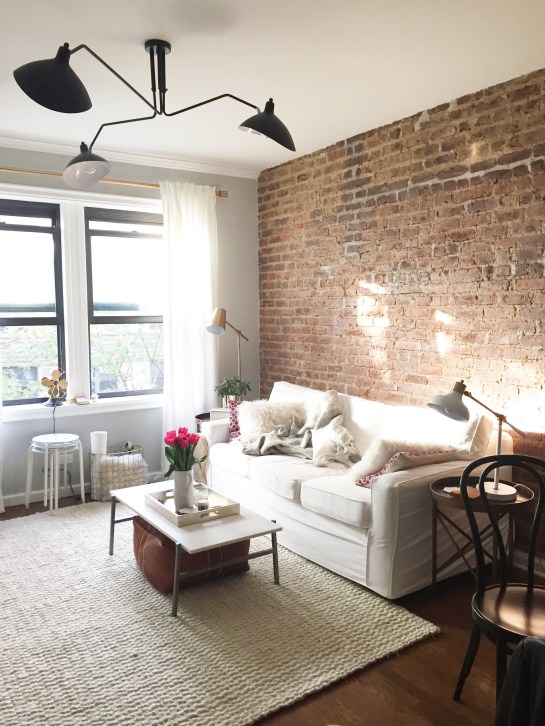
so i took a break. i took some time, and i just LIVED. i didn’t order anything new. i didn’t put up my ceiling medallions. i didn’t seal my brick wall. i didn’t schedule the reinstallation of my f’ed up countertops. i just went about my life, and it felt good.

great, even. sometimes i forget that this entire process unfolded within a single year (and that the bulk of the hard work took place within mere months). GUYS, i was TIRED. physically, emotionally. so i did the very best thing a person can do when they are tired: i rested. i put my to do list on hold, and i just told myself it would all happen someday, maybe even someday soon. but it didn’t have to happen today.

IMG_1892
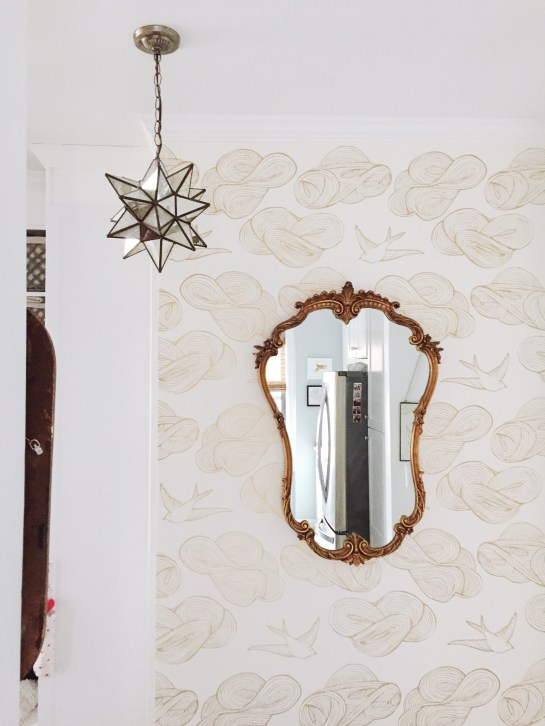
and that revelation? it was so freeing. i am a person who thrives on the ‘go go go’ mentality. i prefer to be busy. i like when things aren’t just done, but done right. i like them to be done fast. sometimes, i can’t sleep until they are done. but that, folks, is a recipe for disaster. especially when you’re working a (somewhat stressful) full time job, juggling a gut renovation, trying to work out 6 days a week, volunteering on the side, and trying to have a social life in between. suffice it to say, i haven’t been on a date in a LONG ASS TIME.

so i gave myself some time to just be. to write if and when i felt like it (it turns out, i didn’t), to do projects when the opportunity arose (guess what? i still haven’t painted my door), and to just live my life, as T.I. says.

IMG_1949
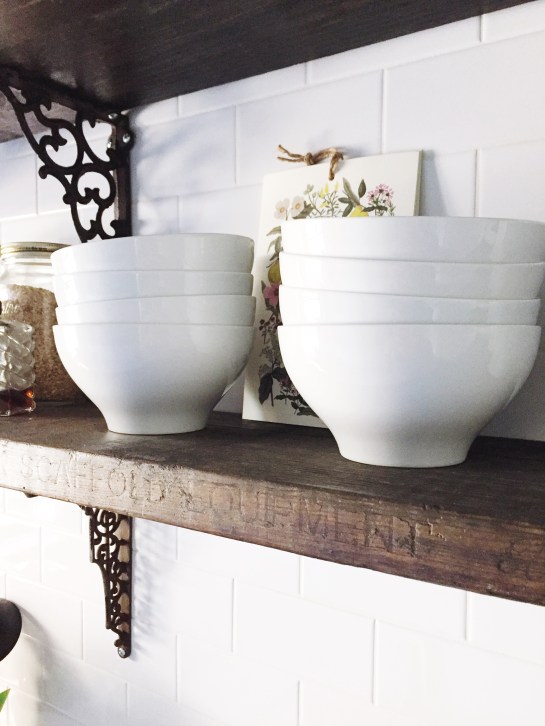
that’s where i’ve been. living. but i’m feeling ever so slightly rejuvenated, and inspired by the lovely strangers who have commented and said, “come back, we miss you!”

SO HERE I AM.  i have so many things i want to tell you! so many posts in my brain that i want to write. like the one about the 5 things i’d do differently if i did this again. or the one about the giant centipede that came crawling out of my exposed brick last week (and why that centipede means i need to SEAL.THAT.BRICK.ASAP). or the one about how my bedroom still doesn’t feel quite right.

IMG_1846
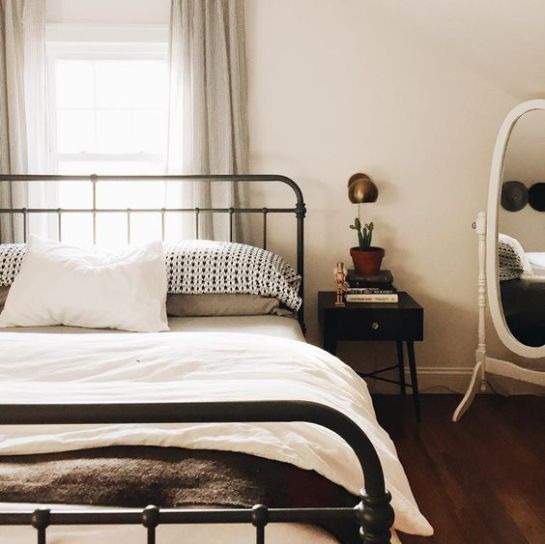
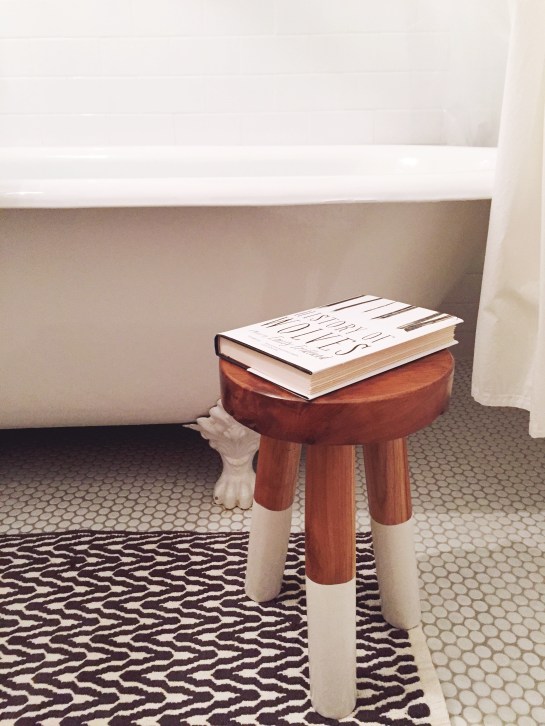
starting is hard, but in the spirit of moving forward, i’m going to do just that: start. below, you’ll find a few snapshots of the grand apartment in its current iteration. it’s not 100% there yet (is it ever?), but it’s close. and it has finally, miraculously, started to feel like home.

if you’re still out there, world, thanks for sticking with me. thanks for reading, and for hearing me out. i love you, for reals, for ever (and ever and ever).

IMG_1918


8a681cb00831b2fcb246cc32ec22bb2e

one of the things i wanted most in my kitchen was an apron style farmhouse sink like the one pictured above. for sink novices (don’t worry, i was one as of 6 months ago), apron style refers to that overhang you see at the front of the sink. unlike undermount sinks, which are essentially dropped into the countertop/cabinet, apron sinks show a little “apron” around the front, which gives them a cozy antique farmhouse feel.

before you say it, yes, i know that i bought an apartment in new york city and not a cozy barn in the woods of vermont, but i grew up in the woods (ish) of massachusetts, and i love me some cozy farmhouse feel. my apartment isn’t big enough for the real markers of country house chic (giant wood beams, brick fireplace, wide planked hardwoods, oversized industrial pendant lights, etc.), but a farmhouse sink: that i could do.

4f016b540f7a3acc_1016-w500-h400-b0-p0-traditional-kitchen

as you may recall, my design plan for the kitchen involved white cabinets, stainless steel appliances, a badass encaustic tile, and wood accents (again, adding a touch of farmhouse to the space!). i figured that a farmhouse sink couldn’t cost more than a few hundred dollars, and once i settled on my design plan, i started hunting around.

GUYS, i could NOT have been more wrong. sadly, this happened to me many times during the renovation process. things ALWAYS cost more than you think they will. such is life, i suppose. as it turns out, farmhouse sinks (nice ones, at least) start at around 700 and go up to 2k. TWO THOUSAND DOLLARS FOR A PLACE WHERE YOU WASH YOUR POTS AND PANS! i’m sorry, am i washing 24k gold in this shit? that price is ridiculous.

what’s a girl to do when she has her heart set on a design element that she can’t afford? she turns to the internet, of course! i started pinteresting my little heart out, and came across this blog post from one of my favorite design blogger, jenny komenda of little green notebook. jenny, too, wanted a farm sink, but she wasn’t willing to toss two thousand bones down the drain to get one.

lucky for me, jenny had a solution! it started with I and ended with KEA. god bless the scandinavians, amiright? the fine folks at ikea had a DOUBLE farmhouse sink, and it cost a (relatively, comparably) minuscule $312.

NOW we were talking.

ikea-sink-review-3-of-4

once i figured out that ikea had what i wanted, i researched some more. how did people style the ikea sink? (very nicely, as exhibit A above proves) did they like it? (most did!) did it scratch easily? (so long as you had barkeeper’s friend, you were fine) was it too big (my contractor said yes, i couldn’t really see it without actually seeing it in person)? was the double bowl annoying? were the grates in the back annoying? (for some, yes)

here’s what my research revealed: the ikea sink was not perfect. some felt the back grates were annoying, that water and soap scum pooled in them. some felt the single bowl was too small, the double bowl, too big. some thought it was too hard to keep clean (i mean, it IS white). but for the price, most people loved it. like, really loved it.

i was sold. so a few months ago, i dragged my ass to ikea on a wednesday night (more about that solo excursion here) and i ordered the double domsjo, which was indeed REALLY f*cking big (37″ long!), but was also really pretty. there it is below, styled in one of those faux ikea kitchens that i love so much.

img_9211.jpg

that was approximately 4 months ago. i’ve been living in the grand apartment for almost 2 months now, and i’ve had my sink connected for about 6 weeks of that time. and so far, i am VERY happy with it. it’s enormous, yes, but that doesn’t bother me. i do the actual washing in the left bowl, and stack the “to be washed” stuff in the right bowl. i keep my dish and hand soap on the grated area, and i just wipe it down every day or so. it doesn’t really seem to get that dirty (though i am somewhat of a neat freak). i’ve only had to clean it with barkeeper’s friend once, and that was only because it got a little greasy after my candle-making adventure.

ikea-sink-review

here it is looking beautiful with a gigantic bunch of fresh eucalyptus in it. ain’t she purty?!

img_0489

here’s a full, totally unstyled shot of the sink from the entrance to the kitchen. it takes up quite a bit of space, but as someone who cooks a lot and therefore makes a lot of dishes, that doesn’t bother me. i haven’t had any trouble with scratches, and i’ve washed that insanely heavy dutch oven you see there atop the stove in it multiple times. all in all, i am very happy. mostly because it’s bright white and beautiful and if i close my eyes real tight and then open them again, i can almost kid myself into thinking i’m in a cozy farmhouse where a fire crackles in the room next to me and the beds are layered with down comforters and the floors creak with every step.

so: who wants to go in on a farmhouse?!

img_8903oh hey, hello, HIII. i know, i dropped off the face of the earth for, oh, about 2.5 months. but in my defense, i was busy doing some hardcore nesting, and i was still ALL ABOUT THAT INSTAGRAM (as always).

lots has happened since we last hung out. i’ve moved in (on halloween weekend, oy)! my counters went in (they are not quite right and will cost 1700 to fix. OY)! my tile and kitchen shelving went up (YASS)!

i have my heart set on doing a professionally photographed, real, true “home tour” once things are done for realsies, so for now, you’ll have to settle for little sneak peeks here and there.

ANYWHO, one of the things i have managed to check off my list is wallpapering the entryway, which is pictured below (scroll down if you’re impatient). i went with this one, and i am straight up obsessed with it. it’s whimsical and glamorous and statement-making without being too loud.

but let’s back up a bit.

here’s the wall pre-wallpaper. nice, white, simple, but it didn’t pop. i worried that it would get easily scuffed, what with everyone and everything (humans, cats, packages) coming in and out of it every day. i also wanted something to play against my amazing worlds away light fixture, which is mercury glass and is my favorite thing in the ENTIRE APARTMENT.

img_8897

i toyed with painting it the same grey as the living room, but that felt like a design letdown, especially when i’d gone and splurged on that vintage persian rug and had spent all this dough to custom build out the entryway storage unit you can see peeking out in the left of the photo above.

i was feeling all uninspired and conflicted, and then i came across this post, from my latest interior design blog obsession, chris loves julia. HELLO, ENTRYWAY OF MY DREAMS! how freaking cute are those oversized brass hooks? (they’re from pottery barn)  how fierce is that paper?!

1000img_9182

suddenly, the way forward was clear: wallpaper was the answer, and wallpaper only. so down a wallpaper rabbit hole i went, pinning the shit out of paper designs and stalking the hygge & west site.

initially, i was eying the rifle paper line. i am an anna bond fan girl and love literally everything she puts out–but it felt like her papers might be just a biiiit too busy for my little wall. i didn’t want to compete with the rug or the light fixture, i just wanted a little bit of pop.

then i stumbled upon this paper. it’s by julia rothman, who is based out of brooklyn (what what), and it’s the most magical. i’m bookmarking it in my brain for my future nursery (if that ever comes to pass), because it’s got this amazing childlike feel to it without being, well, only for children.

hw_jro037_daydream_gold_roll_web

i’ve never installed wallpaper before (or had it installed), and after having a few conversations with people more experienced than myself, i decided NOT to DIY this, and to hire out the job to someone who knew what they were doing.

after deciding not to DIY, i asked my friend holly for her wallpaper guy (her apartment is that of a real grown up and is gorgeous and FULL of beautiful wallpaper!), and gave the man a call. as with pretty much every subcontractor i’ve dealt with in this process, mitch was a wee bit out there, but he knew his shit, and quoted me $350 for a morning of wallpapering, along with a time slot for the following week.

in the spirit of full disclosure, $350 isn’t pennies, at least, not to me. especially given that the paper itself was $150. that being said, under $500 for a beautiful entryway that will make me smile every time i walk in the door feels worth it to me. sure, it’s a plane ticket to mexico, or 10 spin classes, but hey, COMPROMISE, am i right?

i know i couldn’t have done it myself (at least, not well), and the security of having it done right (especially when the paper wasn’t cheap) was worth it to me.

img_8907

here’s the paper guy prepping “daydream” for the wall. is that a portrait of a man who knows what he’s doing or WHAT?! this is what it looked like when he started rolling out the paper on his “wallpaper table” (#industryterms!). it’s also a shot of the moment in which i started freaking out about just how goddamn pretty this paper was. as you can probably tell by the look on his face, he was anxious for me to get the hell out of the apartment and be on my merry way to the office, but hey, when a girl’s excited, she’s excited.

img_8917

and RIGHTFULLY SO, if i do say so myself. because now that it’s installed, i’m in straight up wallpaper heaven! it sounds silly, but somehow, doing this wall has made the space (and the apartment) feel way more “finished” and therefore, way more like home.

next up: going all chris loves julia on the space and adding adorable “S” hooks from anthropologie (no longer available, but similar to these), plus my favorite oversized antique gold mirror.

ps: this wallpaper experience has been so positive that i’m thinking of doing my bathroom, too. stay tuned for inspiration shots and my paper picks for my tiny little porcelain palace.

img_9557

so, remember like 3 months ago, when i stupidly thought i could “get ahead of the game” and start thinking about floor stains? SILLY, SILLY SARAH. if i could go back in time and warn 3 months ago sarah that basically NOTHING would go as planned and that there is really no way to get that far ahead of ANY of this…

well, let’s just say i would.

anywho. in case you missed the post above (clicky clicky, friends!), 3 months ago sarah thought it was as simple as choosing between “light” and “dark” – HAHA. SILLY, SILLY SARAH! TIS NOT THAT SIMPLE, GIRLFRIEND. turns out that, just like paint colors, floor stains come in basically every shade under the sun…AND YOU CAN MIX THEM. which means that there are essentially ENDLESS possibilities.

my floor guy, lou of finishing touch floors, told me that my first step was to take a look at the minwax website and get a feel for the colors. he thought i might be interested in a shade known as “special walnut” (teehee). so over i went to minwax, where i found this very helpful (read: not helpful at all) graphic.

cc9e01b7f985684d398733aa34239dc0

do you see special walnut up there, number 224? it looks OH SO REGULAR, right? REG CITY. so i turned to my friends google and pinterest, to see what they could show me about special walnut.

761c6891ab687ea26448b87eb058fc2c

….pretty regular. so i decided to hunt around on pinterest to see what others liked. as it turned out, special walnut was, surprisingly, pretty popular (#bland, america). people also had quite a thing for english chestnut, weathered oak, and early american.

so i asked lou if we could see a few (read: a bunch) of samples. and on tuesday morning, that’s just what we did.

img_9546

lou’s worker, eric, sanding down the floor for stain tests.

img_9549

amazing how much dirt/stain/grime/life comes off with 5 minutes of sanding, isn’t it? i couldn’t believe how beautiful the hardwoods were in their original oak form. imagining this room being built way back in the 1920s gave me all the feels.

once the floor was sanded, lou wiped it down with water and let it dry, creating a spotless surface for us to work with.

img_9555

here he is opening all the various stains and prepping them in little plastic cups.

img_9560

and here they are all laid out. i immediately ruled out the far right and the third from right – too dark. second from right is special walnut, which, not surprisingly, looked REGULAR, just plain old REGULAR brown, on my floors. the middle dark one is “english chestnut” – pretty, but a little too red/dark for my liking. second from the left is “early american” – meant to make your floors look, well, early american. which mine are.

img_9558

here’s a closer look. so, on the far right, we have a dark brown (i forget the color, apologies!) mixed with weathered gray. on the far left, we have the same mixture, but two parts gray to one part brown. far right might have worked if i wanted to go dark; far left felt drab. second from left is (ding ding ding!) the winner, early american. next to it is english chestnut, which read waaaaayyy too red on my floors (they’re oak, by the way, for those wondering). next to english chestnut was special walnut, looking as drab and brown as they come. apparently, this color really sings on some floors, but on mine, it was like that guy that auditions for the voice and is so horrifically bad that you wonder how he made it past initial casting, let alone got in front of blake and adam.

so, what happens next? after i left, the guys got to work, patching the part of the floor that had been ruined when we took down the wall between the entryway and the kitchen.

IMG_8145

remember when the living room/entryway looked like this?!

the “newer” looking floors you see below are, well, brand new. and magically, just as he promised, lou managed to match them to the old ones. he’s warned me that once stained, the new planks won’t be exactly like the old, because the new wood will take the stain differently than the old floors will, but to me, things look pretty damn good.

img_9578

for reference, i am standing at the very front of the living room; to my left is the dining area, to my right is the breakfast bar (where those cabinets are)

today, lou and his guys are sanding and staining, and by friday night, i’ll have shiny, fresh, beautiful floors. EEK!

just for funsies, let’s take a look at where the living room was when construction started…

grandapt_before_LR

pictured at closing – doesn’t it look so much smaller without the brick wall exposed?

and where it is now, with the brick wall exposed, the lighting up, the front wall painted, and the floors ready for stain.

img_9577

kind of crazy, right? i have a feeling things are about to get GOOD.

a5297fa51b939a7ae848410e3e40bd84

well, folks, we are finally starting to truly get somewhere over on grand street, and with construction (kind of) coming to a close, it’s time to get serious about THE FUN STUFF, aka, the design. the living room and dining room plans, are, for the most part, pretty set – but the bedroom has been, up until recently, up in the air.

which is, in fact, quite a nice segue into how i want the bedroom to feel. see, the grand bedroom is, well, not so grand, especially now that i’ve carved out the entire front wall for a closet. so i need to do everything in my power to make it feel big, not small; spacious, not cramped.

the goal is for the bedroom to feel like one giant cloud, like i’m floating on air, wrapped in the warm cozy hug of this bon iver song i can’t stop listening to.

that means white walls (i’m going with benjamin moore’s “white”), white trim (benjamin moore’s “super white”), white bedding (i have these sheets and this duvet from pottery barn and i love them), and white curtains (i got these from ikea).

i’ve been particularly inspired by danielle moss’ minimalist chicago bedroom (pictured above), though i can’t go quite that kondo on the space (i have a lot of stuff). hence, my goal is to stick to white walls, bedding and curtains, and then add in some warm wood tones and brass to warm up the space.

you may remember this dresser that i found in the basement of my current building – i’m hoping it’ll fit in the back corner of the bedroom.

i’m planning on order two of these urban outfitters sconces (i had my eye on these from schoolhouse electric originally, and may splurge on them at some point, but for now, i need to go more budget-friendly), and spruce up my ikea curtains with these brass curtain rods from west elm.

white sheepskins from ikea will add an extra layer of coziness, and a white ceiling fan will (hopefully) disappear into the ceiling, but keep me cool at night.

and then there’s my bed.

f7f09eaf22ee135dd176d3eaca4cbcbd

this one has spurred a lot of internal debate. one of the things i wanted most in the bedroom was a bigger, better bed. for the last 15 or so years, i’ve been sleeping on the full mattress i’ve had since i got upgraded to a “big girl bed”–aka, it’s high time for a new mattress. and given that i tend to sleep spread eagle (this tends to happen when you’ve been single for eternity and the only other creature that shares your bed is your cat), i have been dreaming of upgrading to a queen.

but beds are expensive. mattresses aren’t cheap. and i didn’t exactly build a new bed into my budget.

this is where my fairy godmother, also known as my friend cassie who works at wayfair, comes in. cassie swooped in and saved the day, budget-wise, hunting down numerous light fixtures i wanted from the interwebs, and gaving me her employee discount on them. this, in turn, saved me some serious dolla dolla bills. just enough dolla bills, in fact, for me to rationalize buying a new bed after all.

which turned into a new dilemma: what kind of bed did i want?! did i want a tufted, ladylike headboard like the one above (from alaina kaczmarski’s bedroom), or an antique-esque victorian wrought iron bed like the one below?

cda42be91e621adaaa4c7f9002d4d9e8

interestingly, when i started hunting for inspiration images of the urban outfitters sconce, i found more than a few shots of the sconce next to–you guessed it–an antique wrought iron bed!

Processed with VSCOcam with a6 preset

71b3c21951e2092af1c61ef89c851aa6

f064f3b04bf6c3ee06719e3c0cdf0f31

so cozy, right? picture this with all white bedding, white sheepskins underfoot for chilly mornings, and soft ambient lighting.

IT’S POSITIVELY CLOUD-LIKE! to recap/for visual learners, here’s the plan:

39db8dc97067ec433b62ae5b15609cdbnow: which mattress to buy? i’m going “bed in a box” – so i need your thoughts on casper, tuft & needle, leesa, et al. HELP!


656f69594b0c41125d9eafea537abbc0

one of my “must haves” during my apartment search was the ever elusive “pre-war charm” — i wanted an apartment with history, an apartment where the walls told stories and the floors were worn with wear.

happily, i found that charm in the grand apartment. original door frames include some seriously intense molding, the bathroom door contained an old crystal doorknob (!!), and the floors were beautiful old thin oak.

and then, of course, i discovered the brick in my living room. you’d think i’d have been satisfied at that point, but no. i wanted MORE CHARM! so i asked my contractor to install crown molding on top of the kitchen cabinets and around the living room walls.

7651412c0ec58be25075cde39d3d8d40

my next goal? to hang ceiling medallions around my three main lights in the living area (living, dining, entryway) to make those light fixtures (my splurgiest, coolest ones) truly pop. for example, how cool is the one above?! i love how it turns a (still very interesting) light fixture into a true statement. medallions are a little more baroque paris than pre-war NYC, but i still think they can work in my space (which is obviously a lot less impressive than the one above, on ALL levels).

here’s what i’m thinking (light fixtures have already been purchased, for dining area, living room and entryway, in that order).

50d5108d072f164258e8ba7e724bec1a

the plan is to order them unfinished, then paint them to match the ceiling color. once they’re up and painted, you’ll never be able to tell they’re not original. and at under $50 a pop, they’re a relatively inexpensive way to add some serious D-R-A-M-A.


img_9212

last week, i spent an evening wandering around the enormously overwhelming aisles of ikea all by my lonesome. i had biked over from manhattan with a singular goal in mind: i needed to order my kitchen sink and my range hood, both of which, the ikea website told me, were “likely to be in stock” when i arrived.

i had assumed that going to the swedish superstore on a weeknight would cut down on crowds, but i hadn’t expected it to be practically empty. ikea red hook is housed in what is effectively an enormous warehouse; take out the people, and it begins to take on a solemn, echoing feel.

by the time i docked my bike across the street from US fried chicken (an eerie looking joint alongside the red hook NYCHA housing project), it had started to rain, a light sprinkle, glistening in the streetlights above. i picked up my pace, partially because i was the only one walking the quiet streets, partially because i worried it would soon start to pour. i felt, just for a moment, scarily, freakily alone. i plugged my headphones into my phone and called my parents. they were at home, starting to eat dinner. i pictured them bustling around the kitchen, warm with yellow light. there’d be a freshly made salad sitting in the middle of their table, and one mom would be yelling at the other to grab the ken’s caesar lite out of the fridge. the news would be on in the background, or perhaps, an episode of madame secretary.

“i’m on my way to ikea,” i said.

“now?”

“it’s raining,” i said in response.

“how did you get there!?”

“i biked, but i had to dock right next to the projects, and now i’m walking alone on a deserted street, so i thought i’d call.”

good mothers that they are, they stayed on the phone with me until i was safely ensconced in the bright yellow and blue womb that is every ikea store in the world (points for consistency, ikea).

as soon as i disconnected the call, i was, again, alone. and much to my surprise, ikea was almost empty. the emptiest i’d ever seen it, certainly. a lone couple sat at the restaurant, sharing a plate of swedish meatballs, heads hunched together, talking quietly.

a woman rode the escalator ahead of me, her husband bringing up the rear, his hand intertwined in hers.

as i entered the showroom, i did what i always do at ikea: i wandered into the faux homes, trying to imagine myself living in them. could i do it, live in a 420 square foot studio? if it was designed by ikea, perhaps.

i opened the kitchen cabinets, peered inside, exited. a few paces ahead of me, two children skidded into the aisle, nearly knocking into me.

“ten cuidado,” their father scolded, “la señora!”

he shook his head, “lo siento.”

it was fine, i told him. here i was, alone in ikea on a wednesday night, in no particular rush.

i arrived at the kitchen area, and snapped some shots of my soon to be sink in situ. flagging down a sales person, i inquired as to the process of bringing one home with me.

img_9202

“well, you have a few options,” she began. “if you want to carry it out with you–are you alone?–you can do that, or you can have it delivered.”

there it was again, that reminder, ever so quiet, yet ever so powerful, that i was, indeed, alone. that i was…that i am, doing this entire thing alone.

“it’s just me,” i laughed, nervously. “i don’t think i could get it out of here on my own. it looks heavy!”

“okay, then, delivery it is. just write down the three numbers, and bring it to the home delivery desk downstairs. they’ll take care of everything for you.”

with that, she was gone. a transaction with zero fanfare. a big moment for me (I AM BUYING A KITCHEN SINK FOR AN APARTMENT IN NEW YORK CITY THAT I OWN), just another hour at work for her.

img_9211

i looked at my sink, price tag and bin number dangling in front of me. beside me, a couple contemplated a faucet.

just for a minute, i let myself imagine what it would be like to be the couple next to me, to be one half of a full unit. to not be alone in ikea on a wednesday night, stupidly feeling like i have to explain myself to a salesgirl who could care less about why i can’t tote the sink home on my own.

i let myself think about how it would feel to turn to my partner and say, “what do you think? can we lift it? that would fit in the backseat of a cab, don’t you think?”

i gave myself a moment. i gave myself one shuddering breath and a few tears dotting the corners of my eyes, and then i moved on.

i pulled my shoulders back, i took my chin from the ground to the sky, i took a deep breath, and i took myself downstairs to the delivery department, where i gave a nice woman with fabulously glittery fingernails my information, and scheduled my delivery for wednesday the 6th of october.

and then i treated myself to a $30 car service across the manhattan bridge, and i rolled down the window, despite the rain. as we inched across the iron behemoth, i stared out at the city–my city, of which i now own a piece–and i told myself, over and over, that being alone in ikea wasn’t the worst of things, not really, not even a little bit, not at all.